Fixed and floating elements (also, how the snaplines plugin works)

Snaplines plugin
In version 6.7.0 we released a new plugin - Snaplines - which you can see in action in our Flowchart builder demonstration. In this post we're going to look at a couple of methods offered by the surface component which allowed us to implement snaplines in a matter of hours.
This is a picture of the snaplines plugin in action:
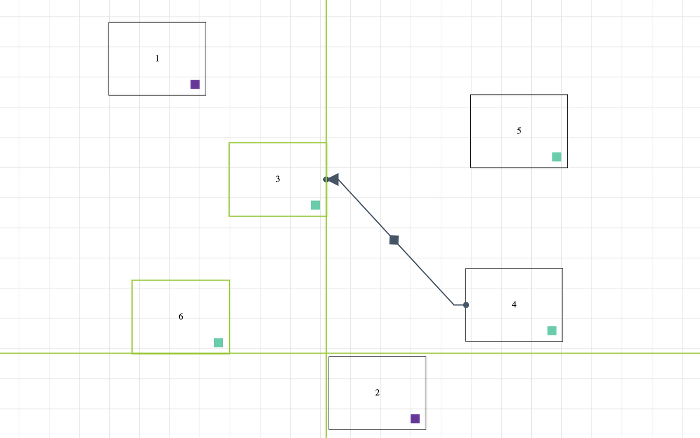
The internal workings of this plugin are quite simple:
- At drag start, record the position of the edges and center of each of the other elements in the canvas
- As the user drags an element, check these positions to see if one of the element's edges, or its center, is in proximity to an edge or the center of one or more other elements
- When the drag element is in proximity to an edge or center of some other element, draw a snapline.
Steps (1) and (2) are just a bit of maths, and we're not going to cover them here. It's step 3 we're here to talk about today - "draw a snapline". As always with computers, it's easy to say something, but how do you actually do it? Fortunately JsPlumb's surface component makes it straightforward.
Fixing elements
The key to the ease with which snaplines was developed is this method that is available on the surface component:
fixElement(el:Element, position:PointXY, constraints?:{left?:boolean, top?:boolean})
Given some DOM element, fixElement will place it on the surface canvas at position - where position is a point in the coordinate space of the elements of the canvas, and then fix it in one or both axes so that it never disappears from view. That's right: fixElement abstracts away all of the considerations about the current zoom level, or where the user has panned the canvas to, and just plonks down the element where you asked it to. When you subsequently pan and/or zoom the canvas, the position of the fixed element is updated so that it stays where you requested. Great!
Snaplines Example
Click on a node in this example and we'll create a horizontal and vertical line, each one passing through the element's center. Then we'll call fixElement for each line:
surface.fixElement(horizontalLine,
        {
            x:p.obj.data.left - (p.obj.data.width * 0.5),
            y:p.obj.data.top + (p.obj.data.height / 2)
        }
)

surface.fixElement(verticalLine,
    {
        x:p.obj.data.left + (p.obj.data.width * 0.5),
        y:p.obj.data.top - (p.obj.data.height / 2)
    }
)
Now when you pan/zoom the canvas, the red cross stays in place where it was fixed. Note that it does not follow the node around - you can drag a node that you previously clicked and the cross will not move. This is by design.
It's important to keep in mind that you can fix arbitrary HTML elements using this method - they don't have to be simple red lines like in this example. You could fix any HTML you like.
Unfixing an element
Notice as you click on new nodes the cross moves? And when you click on whitespace it goes away? There is a companion method - unfixElement - which will remove a fixed element from the canvas. We call this whenever a click occurs on a node or the canvas:
surface.unfixElement(horizontalLine)
surface.unfixElement(verticalLine)
Constraints
You may have noticed the constraints argument to the fixElement method - and also that in both examples above we did not provide a value. The snaplines plugin uses fixElement in the simplest way, but it has some extra tricks: using constraints, you can fix an element to a specific position on the canvas and then if that position ever goes out of the viewport the element will be shifted to ensure it is always visible.
In this next example we have positioned a label at {x:50, y:150} and fixed it so that it never goes into the negative x axis, and we've positioned another label at {x:300, y:20} and fixed it so that it never goes into the negative y axis:
surface.fixElement(myLabel, { x:50, y:150}, {left:true})
surface.fixElement(myOtherLabel, { x:300, y:20}, {top:true})
You can of course fix one element in both axes:
surface.fixElement(myLabel, { x:50, y:150}, {left:true, top:true})
Swim Lanes example
You can use fixed elements to implement sticky headers for swim lanes, which is pretty cool. Try dragging the canvas below to pan it and see how the lane headers stay in place when you pan to the left.
We fix the headers above with this code (this is for the first header):
surface.fixElement(l,{x:50, y:50}, {left:true})
Floating Elements
Another way to decorate your canvas is with floating elements - elements that are positioned at some position relative to the viewport origin, and which do not pan and zoom with the content:
const l = document.createElement("div")
l.innerHTML = "I AM FLOATING"
surface.floatElement(l,{x:10, y:10})
Floating inspector example
In this example we use floatElement to float an HTML element which is configured as an inspector - code is shown below. Click on nodes to inspect them and change their label/background color. Click the canvas to reset the selection.
Our nodes are like this:
{ id:"1", label:"Un", left:150, top:50, bg:"darkslateblue" },
We create the element for the inspector and initialize it like this:
const l = document.createElement("div")
l.className = "floating-inspector"

new VanillaInspector({
    container:l,
    surface:s,
    emptyTemplate:`<span>No selection</span>`,
    templateResolver:() => {
        return `<div>
        <div style="display:flex;align-items:center">
            <strong>ID:</strong>
            {{id}}
        </div>
        <strong>Label:</strong>
        <input jtk-att="label" jtk-focus/>
        <strong>Background:</strong>
        <select jtk-att="bg">
            <option value="darkslateblue">Dark Blue</option>
            <option value="#396a1e">Dark Green</option>
        </select>
    </div>`
    }
})
And then we ask the surface to float the element it is mounted in:
surface.floatElement(l, {x:10, y:10})
Summary
fixElement and floatElement are powerful methods that you can use to bring your apps to a new level. They're tightly integrated with the JsPlumb ecosystem and they're DOM agnostic - you can use any markup you like, meaning it's simple to keep things on brand. The examples here only scratch the surface - pun not intended, but I'm leaving it in - of what you can do.
Start a free trial
Get in touch!
If you'd like to discuss any of the ideas/concepts in this article we'd love to hear from you - drop us a line at hello@jsplumbtoolkit.com.